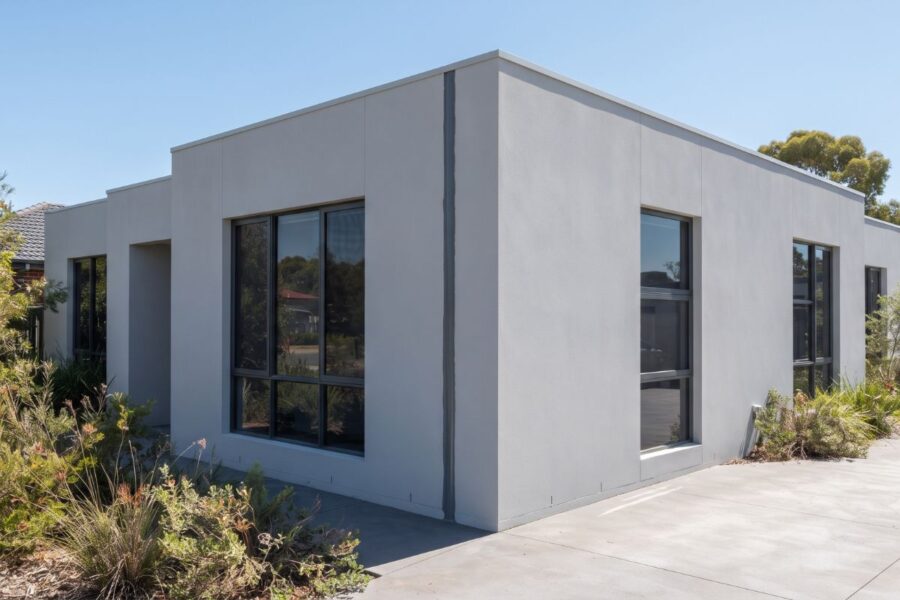
Hebel panels can give a home solid, rendered-look walls that go up quickly. But a good result depends on getting the hidden details right: the steel battens, the screw pattern, the joints and the coating.
This guide explains how Hebel panel installation works on a typical house, what each step involves, and the common mistakes that lead to cracks. It also covers safety and helps you decide whether to do it yourself or hire an installer.
Quick answer
Hebel PowerPanelXL external wall panels are installed vertically over a timber or steel stud frame. First, a damp-proof course and wall wrap go on. Then horizontal perforated steel “top hat” battens are screwed to the studs, and each 75mm panel is screwed to those battens.
Panel edges are glued together with Hebel Adhesive, and movement (control) joints are sealed with flexible sealant. Finally, the wall gets a fit-for-purpose acrylic coating system, which keeps water out. The number of battens and screws depends on your wind category, stud spacing and panel position, so always follow the current manufacturer guide.
What are Hebel panels?
Hebel is CSR’s brand of autoclaved aerated concrete, or AAC. AAC is a lightweight concrete filled with tiny air pockets, then cured with steam under pressure. Hebel describes it as about a quarter of the weight of conventional concrete.
This guide focuses on Hebel PowerPanelXL, the panel CSR makes for houses and low-rise multi-residential external walls in Australia. Each panel is:
- 75mm thick and 600mm wide
- available in stock lengths from 2400mm to 3300mm
- reinforced with steel that has an anti-corrosion coating
- fixed vertically, so one panel usually spans the full wall height of a storey
Hebel also makes other products, such as PowerPanel50, PowerFloor and PowerBlock. Their installation methods differ, and New Zealand uses its own Hebel guides, so check you are reading instructions for your exact product and country.
Can you install Hebel panels yourself?
You can do small Hebel projects yourself, but a full external wall is better left to an experienced Hebel installer for most people. Several things make it harder than it looks:
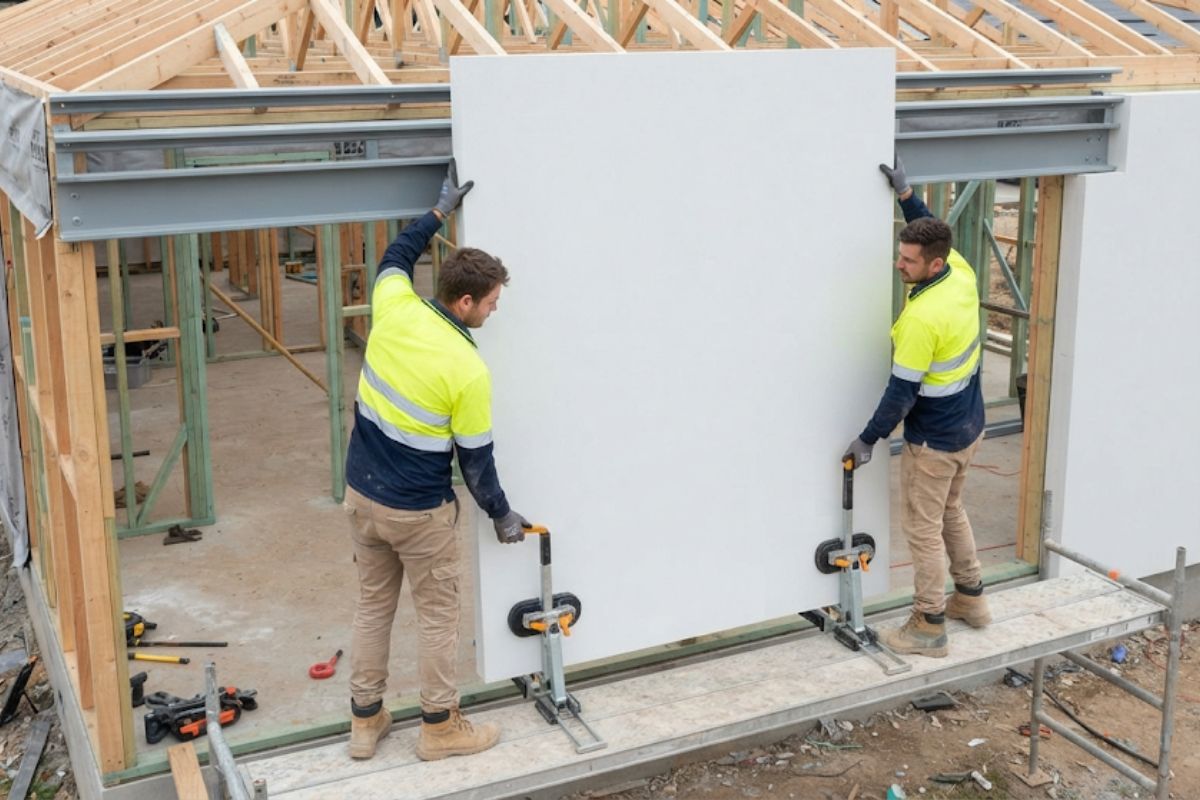
- Weight. Hebel lists PowerPanelXL panels at roughly 58kg (2400mm) to 80kg (3300mm) each. They need two people and panel lifters.
- Engineering inputs. Batten numbers and screw counts come from design tables based on wind category and stud spacing. The frame must also be designed to carry the panels.
- Warranty conditions. CSR says its product guarantee applies only when all system components are ones it specifies.
- Legal and safety rules. Licensing and owner-builder rules for building work vary by state. Businesses cutting materials that contain crystalline silica, including AAC, must also meet stricter work health and safety rules that started on 1 September 2024.
If you are an owner-builder, CSR runs free installer training sessions. Even so, it is worth having an experienced installer check the batten layout and control joint plan before you start.
Before you start: planning checks
Good Hebel walls are mostly decided on paper. Before any panel arrives, confirm these points with your builder, designer or engineer:
- Wind category for the site, such as N2 or N3. This sets how many top hats and screws each panel needs.
- Frame design. The stud frame must be designed for the panels’ weight and the wind loads. Steel cross-bracing is preferred so panels sit flat.
- Control joint layout. Decide where the vertical and horizontal movement joints go before you fix battens, because battens must break at each joint.
- Window and door reveals. Reveal sizes change with stud and top hat size, so order windows to suit.
- Panel layout. Hebel recommends designing wall heights and lengths around a 300mm module to reduce cutting and waste.
- Footings and ground levels. Hebel’s guide calls for footings that meet articulated masonry veneer standards (AS 2870). It also requires at least 25mm between the bottom of the panel and the finished ground or garden bed.
- Termite management. Hebel is not a termite food source, but your timber frame still needs protection under AS 3660. Our guide on whether you can do termite control yourself explains your options.
Tools, materials and safety gear
Have everything on site before you start. Hebel’s guides list the following for a PowerPanelXL wall:
| Item | What it is for |
| Hebel PowerPanelXL panels | The wall itself |
| Perforated steel top hats (24mm or 35mm) | Battens that connect panels to the frame |
| Type 17 hex head screws (several sizes) | Fixing top hats to studs and panels to top hats |
| Hebel Adhesive (20kg bags) | Gluing panel edges together |
| Damp-proof course (DPC) and wall wrap | Moisture and condensation control |
| Backing rod and flexible paintable sealant | Filling control joints |
| Hebel Anti-Corrosion Paint | Coating any reinforcement exposed by cutting |
| Hebel Patch | Repairing chips and small damage |
| Notched trowel, mixing paddle, sanding float, levelling plane | Applying adhesive and finishing joints |
| Panel lifters or trolley, clutch-controlled drill, sockets | Handling and fixing panels |
| Saw with a diamond or metal-cutting blade, plus dust extraction | Cutting panels to size |
| P2 respirator, safety glasses, hearing protection, leather gloves | Personal protection |
Working safely with Hebel dust
Uncut Hebel is supplied as non-hazardous, but cutting, drilling or sanding it creates dust that contains crystalline silica. Breathing in fine silica dust can damage the lungs over time.
Hebel recommends:
- a P2 particulate respirator, or better protection where dust levels are high
- a plunge saw with a cutting shroud connected to an M or H class HEPA vacuum
- safety glasses or goggles and hearing protection
- gloves and loose clothing, because the dust can irritate skin
Cut outdoors where you can, keep other people away and clean up with a suitable vacuum rather than a broom. Mechanical lifting aids help reduce the risk of back injury.
Step-by-step Hebel panel installation
These steps follow the sequence in Hebel’s current PowerPanelXL installation guide. Use them to understand the process, then check every measurement against the Hebel PowerPanelXL Design and Installation Guide for your project.
Step 1: Finish and check the frame
Complete the wall frames and roof trusses first. Check that studs are straight, plumb and correctly spaced, and that bracing is in place. Any bow in the frame will show in the finished wall.
Step 2: Lay the damp-proof course
Fix the DPC to the bottom plate of the frame so it fully covers the slab rebate. Overlap it at corners. It stops rising damp reaching the panel base and lets the panel move slightly against the slab.
Step 3: Install the wall wrap
Install wall wrap (sarking) over the frame as its manufacturer specifies, lapping it over the DPC at the base. In climate zones 6, 7 and 8, the wrap must be vapour permeable to meet condensation rules in the National Construction Code (NCC).
Step 4: Fix the top hats
Screw the perforated top hats horizontally across the studs, usually with two screws per stud. Pack them to a string line so they are flat and plumb.
The number of top hats depends on panel length, wind category and whether the panel is within 1200mm of a corner. Hebel’s checklist calls for at least three per panel. The top and bottom top hats sit no more than 250mm from the panel ends, or 150mm where a fire rating is needed. Add extra top hats above and below openings, and stop the top hats at each control joint.
Step 5: Measure and cut panels
Measure each opening and wall height, then cut panels using a guide fence and the dust controls above. Where cutting exposes the steel reinforcement, coat it with Hebel Anti-Corrosion Paint so it cannot rust.
Step 6: Apply the adhesive
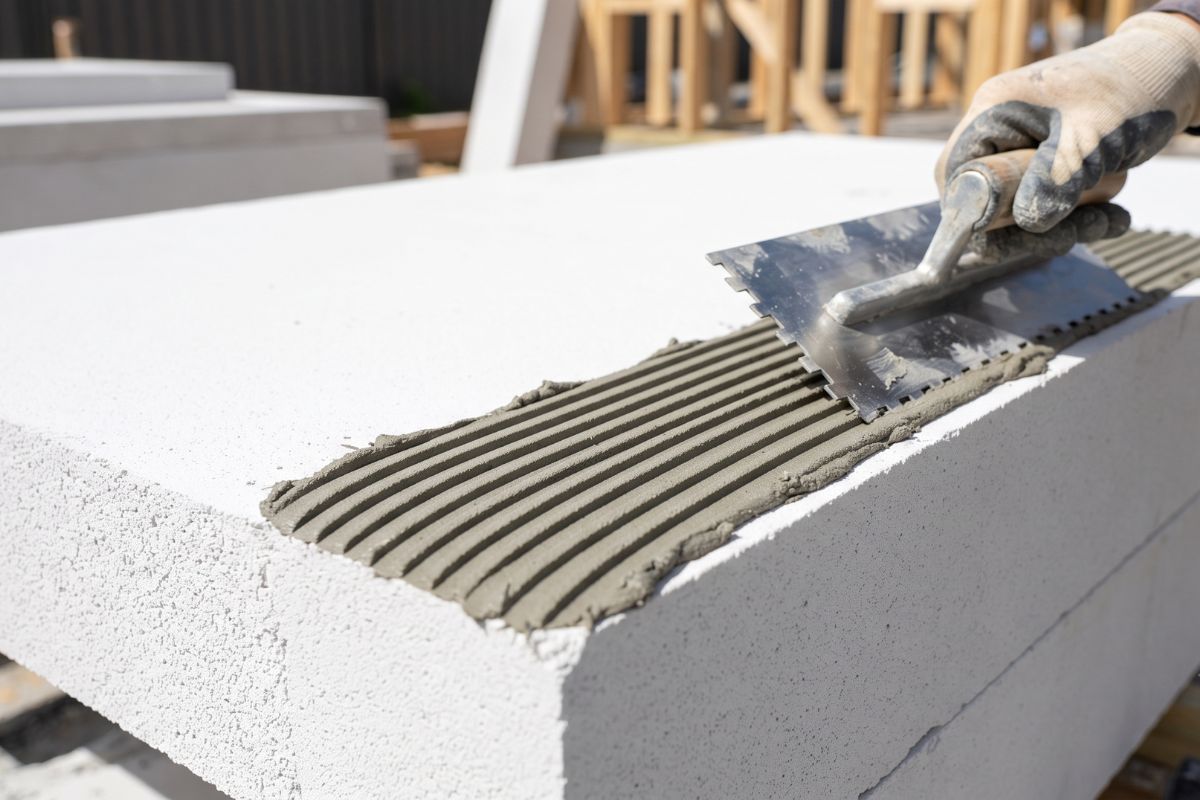
Mix Hebel Adhesive to a thick, flowable consistency. Spread it over the entire edge of the panel using a notched trowel the same width as the panel.
This step matters more than it seems. Hebel warns that too little adhesive at panel joints can lead to hairline cracks. Do not put adhesive in control joints, which must stay flexible.
Step 7: Lift, position and screw the panels
Start with a corner panel. Lift it into place with panel lifters, check it is straight and level, and screw it to each top hat.
Panels are fixed from outside with 14-10 x 90mm hex head Type 17 screws. Hebel’s tables usually call for two to four screws per panel at each top hat, with more near corners and in windier areas. Tighten screws firmly without crushing the panel face.
Butt each new panel tightly against the last so a little adhesive squeezes out of the joint. Keep checking that the wall is flat and plumb as you go.
Step 8: Form the control joints
Control joints let the wall move without cracking. They are usually about 10mm wide, filled with a backing rod and a flexible, paintable external sealant.
Hebel’s guide requires them at:
- regular intervals along each wall, from every 6m on stable sites to every 4.5m on highly reactive clay sites
- internal and external corners, unless the corner is glued, screwed and meshed as Hebel details
- above and below doors, and beside larger windows
- floor junctions, and anywhere the wall height changes by more than 20%
Step 9: Clean up and patch
When the squeezed-out adhesive is semi-hard, scrape it flush with the panel face. Fill screw heads, chips and small damage with Hebel Patch, then lightly sand the surface so the coating can bond.
Step 10: Apply the coating system
The coating is part of the wall system, not decoration. Hebel PowerPanelXL walls are “face-sealed”, which means the coating and sealants are what keep rain out.
Hebel recommends:
- a fit-for-purpose acrylic system, ideally three layers: a base levelling coat, a texture coat and a finish coat
- a system the coating maker warrants for AAC, which stops liquid water but lets water vapour escape
- reinforcing mesh in the base coat at specific joints, such as glued corners
- applying the coating as soon as possible and within 60 days of panel installation
- clean, dry panels, with joint sealant applied before the base coat
Hebel says a simple paint coating is likely to be inadequate. Follow the coating manufacturer’s instructions for each layer’s thickness and drying time.
Common Hebel installation mistakes
Most Hebel wall problems trace back to a few avoidable shortcuts:
- Too little adhesive at panel joints, which can cause hairline cracks.
- Missing or badly placed control joints, or top hats run straight through them.
- Too few screws or top hats near corners or in windy areas.
- Plain render and paint instead of an approved, flexible coating system.
- Leaving panels uncoated for months, exposed to weather.
- Soil or garden beds against the wall, closer than the 25mm minimum clearance.
- Unsealed gaps around windows, doors and service penetrations.
- Exposed reinforcement left uncoated after cutting.
How to maintain a Hebel wall
Hebel walls need less upkeep than many claddings, but the coating and sealants do need attention. Hebel’s guide recommends periodic inspections of coatings, flashings and sealants.
A simple routine looks like this:
- Walk around the house at least once a year and look for cracks, gaps or peeling coating.
- Reseal or recoat any crack that could let water in straight away.
- Repaint or recoat on the schedule your coating manufacturer recommends.
- Keep soil, mulch and garden beds below the base of the wall.
- In coastal areas, wash down walls sheltered by eaves twice a year if you live within 1km of the sea.
If cracks are wide, growing or appear in a stepped pattern, ask your builder or a structural engineer to check for frame or footing movement.
Is Hebel right for your home?
Hebel suits many Australian homes, but it is not the right fit for every project. Here is a balanced view based on Hebel’s published data:
| Consideration | What Hebel’s guide says |
| Fire | Non-combustible. The PowerPanelXL system can reach a fire resistance level of up to 180/180/180 and suit all bushfire attack levels up to BAL-FZ, with conditions. |
| Thermal performance | The 75mm panel alone is about R0.6. With wall wrap and batts, whole-wall R-values range from about 1.5 to 3.4. |
| Sound | Laboratory ratings of Rw 38 to 44 for the tested wall systems. Real-world results are usually lower. |
| Speed | Hebel says experienced installers can clad a 150m² home’s external walls in about three days. |
| Upkeep | Relies on a well-maintained coating and sealants to stay weatherproof. |
| Fixings | Heavy items need fixings designed for AAC, and some loads need engineering advice. |
Walls are only one part of a comfortable home. Windows, roofing and cooling choices all affect energy use. You may also find our guides to double glazed awning windows, Colorbond roofing and split system air conditioner benefits and trade-offs useful. For more project ideas, browse our home improvement guides.
Final thoughts
Hebel panels can give you a fast, fire-resistant and comfortable wall, but only when the system is installed as designed. Most problems come from rushed details: thin adhesive, missing control joints or the wrong coating.
If you are planning a Hebel build or extension, ask your installer how they will handle the batten layout, control joints and coating before work begins. Those answers will tell you a lot about the result you can expect.