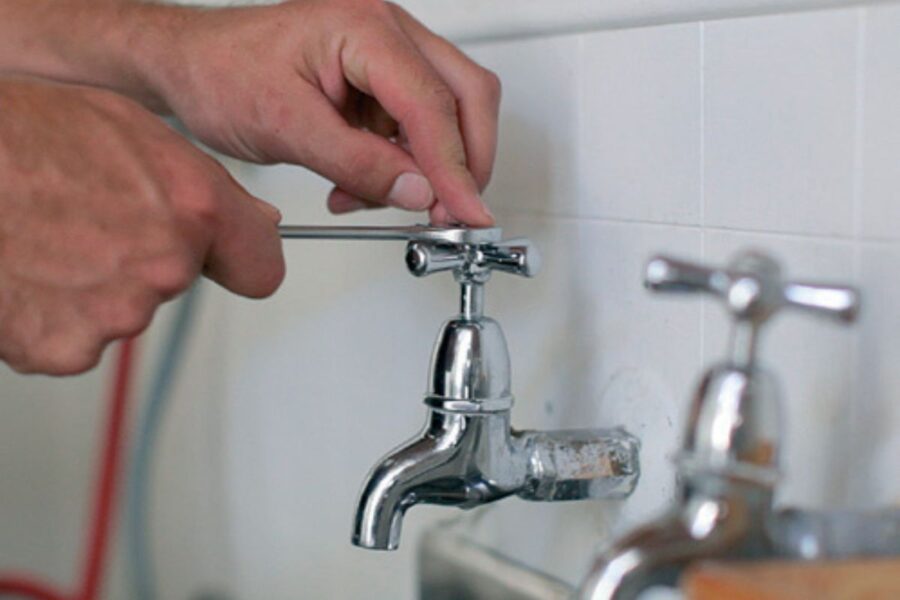
A leaking tap spindle is usually caused by a worn spindle O-ring, body washer, jumper-valve washer, damaged valve seat or worn spindle assembly. The position of the water tells you where to start: a drip from the spout points to the closing seal or valve seat, while water around the handle usually points to an O-ring or spindle seal.
Before taking the tap apart, identify the tap type and confirm that the repair is permitted where you live. Traditional compression taps, quarter-turn ceramic taps and mixer taps use different internal parts. Replacing a washer in the wrong mechanism will not solve the leak and may damage the fitting.
Quick answer: Turn off the water, open the tap to release pressure and locate the exact leak. On a traditional spindle tap, replace only the matching worn component, inspect the valve seat and reassemble the spindle in the open position. Stop if the isolation valve fails, the tap body is cracked, the pipework moves or local rules require a licensed plumber.
What Is a Tap Spindle?
In a traditional compression tap, the spindle is part of the headwork that sits beneath the handle. Turning the handle rotates the spindle and moves a washer or jumper valve towards or away from the valve seat inside the tap body.
When the washer presses evenly against the seat, it stops the water. When you open the tap, the spindle lifts the washer and allows water to flow.
The term “spindle” is sometimes used loosely for several tap parts. A conventional spindle assembly may include:
- A threaded stem connected to the handle
- One or more O-rings around the stem
- A bonnet or headwork body
- A body washer or sealing ring where the headwork meets the tap body
- A jumper valve or washer at the bottom
Many modern mixer taps and quarter-turn taps use ceramic cartridges instead. Their handles may still have a stem, but their repair procedure and replacement parts differ from a washer-style spindle tap.
Diagnose the Leak Before Removing Anything
“Leaking tap” can describe several different faults. Dry the tap completely, then watch where fresh water first appears.
| Where water appears | Most likely causes | What to inspect first |
| From the spout while the tap is off | Worn jumper-valve washer, damaged valve seat, faulty ceramic cartridge or debris on the sealing surface | Washer or cartridge type, valve seat and correct closing action |
| Around the handle or spindle while the tap is running | Worn spindle O-ring, gland seal or packing | O-ring or spindle seal around the moving stem |
| Around the bonnet where the headwork meets the tap body | Damaged body washer, loose bonnet, damaged threads or corrosion | Body washer, sealing face and bonnet condition |
| Around the rotating base of a swivel spout | Worn spout O-rings | Spout seals rather than the tap spindle |
| Under the basin or inside the cabinet | Loose connection, failed flexible hose, damaged tap body or pipe leak | Supply connections and pipework; isolate the water promptly |
| From behind a wall-mounted tap flange | Failed concealed joint, damaged waterproofing or pipework | Stop using the tap and arrange professional assessment |
This diagnosis prevents a common mistake: changing the washer because the tap leaks around the handle. A spout drip and a spindle leak often need different parts.

Common Causes of a Leaking Tap Spindle
1. A worn spindle O-ring
The spindle turns and moves through a seal. Over time, that O-ring can flatten, crack, harden or lose elasticity. Water then travels along the spindle and appears beneath the handle, usually when the tap is open.
The replacement must match the original size and material. An O-ring that is slightly too large may make the handle stiff, while one that is too small may continue leaking.
2. A damaged body washer
The body washer seals the joint between the removable headwork and the fixed tap body. If it is split, distorted or missing, water may escape around the bonnet.
Simply tightening the bonnet harder is not a reliable fix. Excessive force can damage threads, distort a seal or make the next service difficult.
3. A worn jumper-valve washer
If the tap drips from the spout after it has been turned off, the washer at the bottom of the spindle or jumper valve is a common suspect. Repeated compression, heat, mineral deposits and aggressive overtightening can damage it.
A new washer should match the diameter and profile of the old one. A part that “almost fits” may sit unevenly or block normal movement.
4. A pitted or damaged valve seat
The washer closes against a circular seat inside the tap body. Corrosion, grit or wear can make that surface rough. A new washer placed against a damaged seat may start leaking again quickly or fail to seal at all.
Valve-seat dressing or replacement can cross into regulated plumbing work and can damage the tap body if done incorrectly. Check local rules and use a licensed plumber when the seat is badly worn.
5. Worn spindle threads or handle splines
The threaded section translates handle rotation into movement. If the thread is stripped, the tap may keep turning, fail to close firmly or feel as though it slips. Worn handle splines can create similar symptoms even when the internal spindle remains sound.
In these cases, replacing a washer alone will not restore correct operation. The spindle, handle or complete headwork may need replacement.
6. Corrosion and mineral deposits
Corrosion can make the spindle stiff, damage sealing faces and seize the bonnet into the tap body. Mineral deposits may prevent a washer or cartridge from sitting flat.
Do not use extreme force on a seized spindle. Twisting the fixed tap body or connected pipe can create a more serious leak inside a wall, vanity or cabinet.
7. The wrong diagnosis or replacement part
A ceramic cartridge can drip from the spout, but it does not use the same jumper-valve washer as a conventional compression tap. Some quarter-turn taps require a model-specific replacement cartridge or complete headwork.
Photograph the assembly before removal and take the old part to a plumbing supplier if the model is unknown.
Can You Fix a Leaking Tap Spindle Yourself?
Minor tap maintenance may be allowed in some locations, while other plumbing repairs require a licensed person. Rules can differ between Australian states and territories, and rental or strata properties may have additional requirements.
For example, NSW Government plumbing and licensing guidance explains that plumbing work is regulated and may require a licence or supervision. Check the rules that apply to your location and exact repair before starting.
Do not dismantle the tap yourself when:
- You cannot fully isolate the water
- The leak is behind a wall or beneath a fixed surface
- The tap body or connected pipe moves when you apply light pressure
- There is significant corrosion, a crack or water damage
- The repair involves concealed pipework, altering plumbing or gas equipment
- You are a tenant without the required permission
- The manufacturer or product warranty requires authorised service
For broader precautions before starting household maintenance, see our guide on making your home safer.
Tools and Parts You May Need
For a straightforward, permitted repair to a traditional compression tap, the usual items are:
- A flat-head and Phillips-head screwdriver
- An adjustable spanner or correctly sized spanner
- Soft jaw covers, tape or a thick cloth to protect finished surfaces
- A small pick that will not scratch the spindle groove
- A replacement jumper-valve washer, spindle O-ring and body washer of the correct sizes
- A small amount of silicone-based tap grease approved for potable-water fittings
- A towel and shallow container
- A phone camera to record the order and orientation of parts
Do not use petroleum grease on rubber seals unless the manufacturer specifically allows it. It may damage some elastomers. Plumber’s thread-seal tape is also not a substitute for an O-ring, body washer or compression seal.
How to Fix a Leaking Tap Spindle
The following method applies to many traditional washer-style compression taps. Stop if your tap uses a ceramic cartridge, has an unfamiliar assembly or does not come apart with reasonable force.
Step 1: Identify the tap and obtain matching parts
Check whether the handle rotates through several turns or only a quarter turn. A multi-turn tap is more likely to use traditional compression headwork, while a quarter-turn tap commonly uses a ceramic mechanism.
If possible, identify the brand and model. Do not assume a universal repair kit will fit every tap.
Step 2: Isolate the water supply
Use the local isolation valves if they operate correctly. Otherwise, use the property’s main shut-off valve if it is safe and permitted to do so.
Open the tap to confirm the flow has stopped and release the remaining pressure. If water continues flowing, stop and arrange a plumber rather than dismantling a pressurised fitting.
Step 3: Protect the basin and small parts
Place a towel over the basin or work surface. Cover or plug the waste so a screw cannot disappear down the drain. Keep parts in removal order.
Step 4: Remove the handle
Carefully prise off the hot or cold indicator cap if fitted. Remove the handle screw, grub screw or retaining fastener and lift the handle away.
If the handle is seized, do not lever hard against a basin, tile or thin tap body. A suitable puller or professional assistance may be safer.
Step 5: Remove the cover and bonnet
Unscrew the decorative cover if present. Wind the spindle to the fully open position before removing the headwork. This helps prevent the washer from pressing against the valve seat while the assembly is unscrewed.
Hold the tap body steady and use the correctly sized spanner on the bonnet flats. Protect chrome or painted finishes. Stop if the entire tap or connected pipe starts moving.
Step 6: Remove and inspect the spindle assembly
Lift out the headwork and note the position of every washer and seal. Inspect:
- The jumper-valve washer at the bottom
- The O-ring around the moving spindle
- The body washer beneath the bonnet
- Threads and handle splines
- Corrosion, cracking or distortion
- The valve seat inside the tap body
A bright light can help you see pitting or debris on the seat. Do not drop tools into the open tap body.
Step 7: Replace only the correct worn components
Remove the damaged washer or O-ring without scratching its groove or sealing surface. Clean away loose debris with a soft cloth.
Fit an exact replacement in the same orientation. Apply only a thin film of suitable silicone tap grease to an O-ring if the product instructions allow it. Grease is not needed on every sealing face and should not be used to hide damage.
Step 8: Reassemble the tap in the open position
Keep the spindle wound open while returning the headwork to the tap body. Start the bonnet thread by hand so it does not cross-thread. Tighten it firmly enough to seal without excessive force.
Reinstall the decorative cover and handle in their original positions.
Step 9: Restore the water slowly
Close the tap gently, then restore the water supply slowly. Watch the bonnet, handle, spout and area below the fitting as pressure returns.
Open and close the tap several times. Confirm that it operates smoothly and that no fresh moisture appears. Check again after a few minutes rather than assuming the first dry wipe proves the repair is complete.
Why Is the Tap Still Leaking After a New Washer?
A new washer will not solve every drip. If water still comes from the spout, consider these possibilities:
- The valve seat is pitted, corroded or covered in debris
- The washer is the wrong size, shape or hardness
- The jumper valve is not moving freely
- The spindle thread does not lower the washer correctly
- The tap uses a ceramic cartridge rather than a compression washer
- The cartridge is installed in the wrong orientation
- Water is crossing through a mixer or another connected fitting
- Excessive or unstable water pressure is contributing to repeated failure
- The tap body is cracked or internally damaged
If water now appears around the handle or bonnet, the O-ring, body washer, sealing face or bonnet installation needs inspection. Repeated tightening is not a safe substitute for finding the cause.
Repair the Spindle or Replace the Whole Tap?
A minor seal replacement makes sense when the tap body is sound, matching parts are available and the mechanism operates smoothly.
Replacing the spindle or complete tap may be more practical when:
- Threads or handle splines are stripped
- The spindle is heavily corroded or seized
- The valve seat has been repeatedly dressed or is badly damaged
- The body is cracked
- Correct parts are no longer available
- Several parts fail repeatedly
- The tap is inefficient, difficult to use or unsuitable for the household
Do not purchase a replacement tap until you understand the existing mounting, hole configuration, water connections, pressure requirements and local installation rules.
When Should You Call a Plumber?
Call a licensed plumber when the shut-off valve does not isolate the water, the leak is concealed, the fitting or pipework moves, corrosion is severe, the valve seat is damaged, the tap body is cracked or a correctly matched seal does not stop the leak.
Professional help is also sensible for repeated failures, unusually high pressure, wall-mounted taps, inaccessible fittings, rental or strata properties and any work beyond minor maintenance allowed in your area.
Our overview of essential plumbing services for a home explains other situations where a plumber may be needed rather than a temporary DIY repair.
Final Thoughts
Fixing a leaking tap spindle starts with locating the water, not automatically replacing a washer. A spout drip, handle leak, bonnet leak and hidden pipe leak each point to different components.
If the repair is permitted and the tap is a straightforward compression design, careful isolation and replacement of the correct O-ring or washer may solve the problem. Stop when parts are seized, damaged or unfamiliar, and never risk twisting connected pipework for the sake of a small DIY repair.
For more maintenance guidance, explore The Care Diary’s plumbing articles.